

 Loading...


-
For Samsung Galaxy Note 3 N9005 LCD Screen and Digitizer Assembly with Front Housing Replacement - Black - Grade S+
The item includes:
1. LCD Screen;
2. Digitizer Touch Screen;
3. Front Housing;
4. Ear Speaker Mesh Cover;
5. Home Button;
6. Navigator Flex Cable Ribbon;
7. Stylus Sensor Film;
8. Side keys.
Notice: Please test the functionality of this item before installation.
Specifications:
Size: 5.7 inches
Type: Super AMOLED capacitive touchscreen, 16M colors
Resolution: 1080 x 1920 pixels, 386 ppi pixel density
Protection: Corning Gorilla Glass 3
Color: Black
Version: LTE Version
Compatibility: Samsung Galaxy Note 3 N9005
Features:
This Samsung Galaxy Note 3 N9005 screen replacement is black, please note.
This Samsung N9005 replacement is branded with Samsung logo on the top.
This Galaxy Note 3 N9005 screen assembly is 100% OEM manufactured and assembled.
This part is only compatible with the Samsung Galaxy Note 3 N9005 LTE Version.
This Galaxy Note 3 N9005 digitizer replacement includes the front housing, please do not confuse it with the Samsung Galaxy Note 3 N9005 LCD Screen and Digitizer Assembly.
How to Install / Tips:
These parts are hermetically attached. Special tooling and skills are required for replacing this Samsung Galaxy Note 3 N9005 LCD screen assembly.Please try to handle the repair or replacement work in a dry and dust free environment without direct sunlight.
The installation of the Galaxy Note 3 N9005 LCD assembly should be done by a qualified person. ETS is not responsible for any damage caused during installation.
How to Disassemble Samsung Galaxy S3
What you will need to disassemble/repair broken Galaxy Note 3 parts: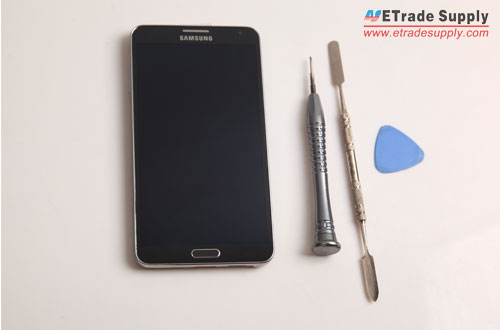
•Small Phillips Screwdriver
•Spudger Tool
•Case Opening Tool
Step 1: Power off the Samsung Galaxy Note 3
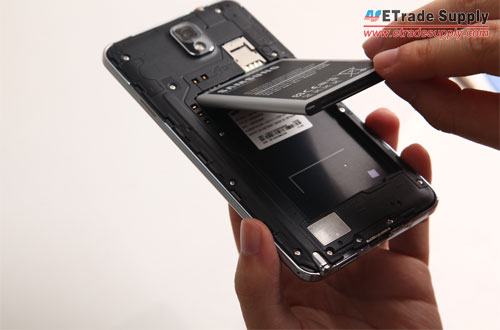
Step 2: Remove the Note 3 back cover and battery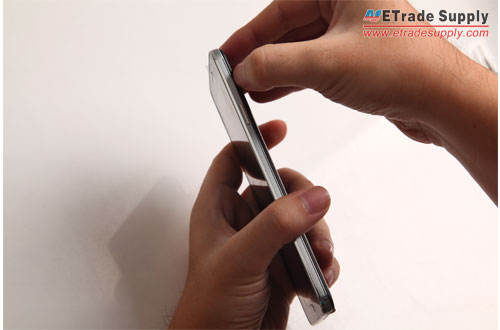
Step 3: Take out the SIM card
Step 4: Unscrew the 12 screws to remove rear housing
Use Phillips Screwdriver to undo these 12 screws securing the back housing and front housing.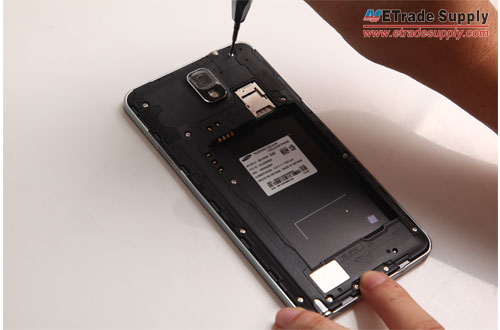
Note: Check if your SM-N9005 or SM-N900 or other Galaxy Note 3 models came with a warranty sticker covering a screw. Remember unscrewing it will void your warranty or insurance.
Step 5: Take out the stylus/S pen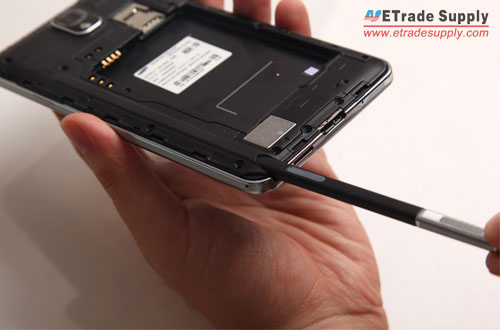
Step 6: Pry up the rear housing and take it out
Use Spudger tool to slide around the housing frame to pry up the back housing. If you do not have Spudger at hand, you can use a plastic tool or guitar pick instead.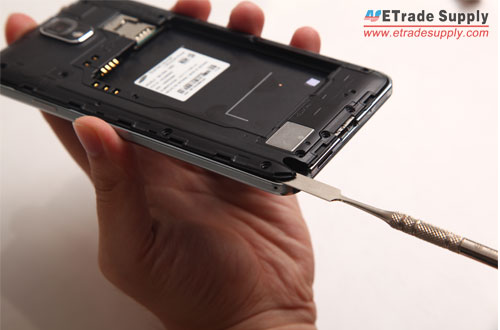
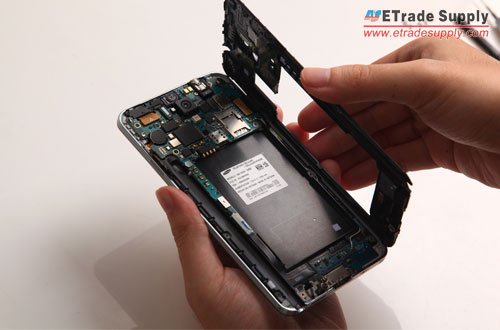
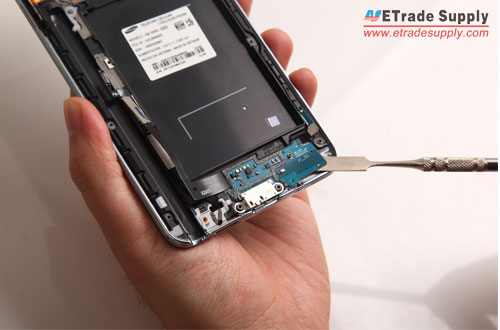
Step 7: Remove the motherboard by disconnecting 6 cables connectors
Release these flex cable ribbons of front-facing camera, proximity sensor, headphone jack and LCD. Pop out the flex cables of home button and charging port at the bottom of the motherboard. Then Pop out the antenna connector.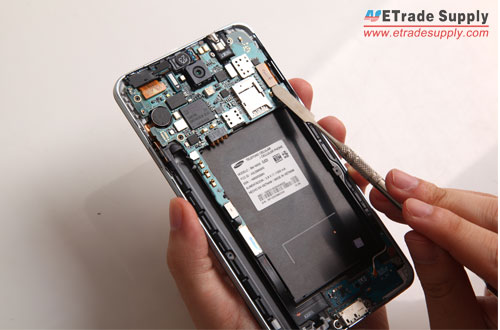
Step 8: The Galaxy Note III motherboard is separated.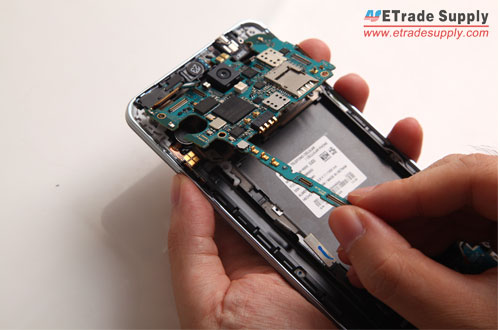
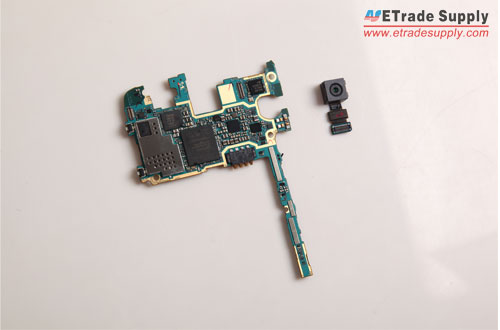
Step 9: Remove the back camera
Easily remove the Note 3 back camera installed on the motherboard.
Note: If your note 3 back camera module is damaged, you can replace it at this step for repair.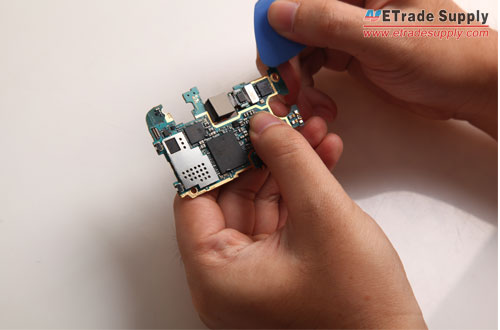
Step 10: Remove the antenna connector and USB module
Take off the antenna connector with case opening tool to remove USB module carefully. The USB board is stuck with adhesive. Pull it off carefully.
Note: You can replace the broken USB port at this step.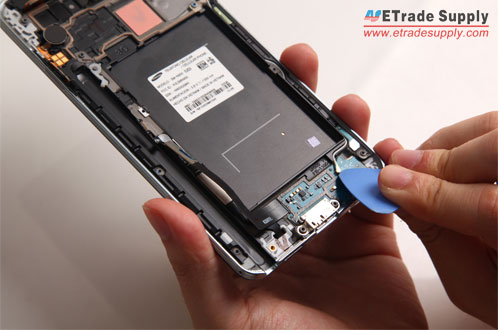
Step 11: Take out the earphone jack and earphone
Unscrew the screw securing the headphone jack and earphone. Then take it out.
Note: Note 3 users can replace the damaged headphone jack and speaker at this step.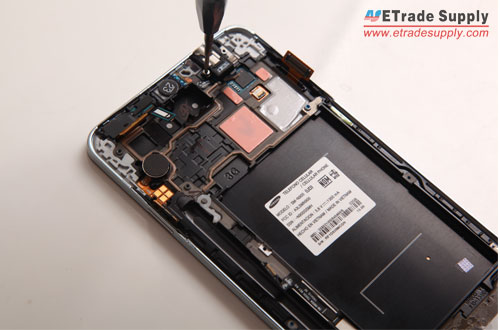
Step 12: Release front camera and sensors
Peel off the metal shield of front housing to lift up the front camera and sensors.
Note: You can fix a broken front camera and sensors at this step.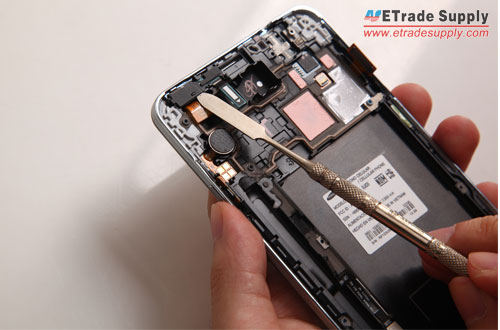
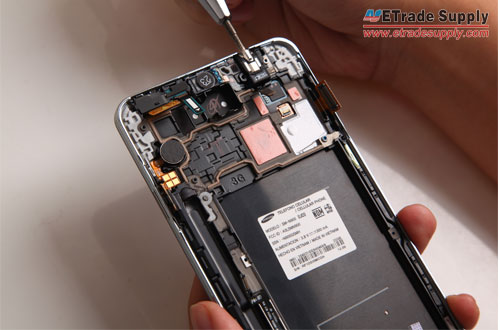
Step 13: Take out vibrating motor
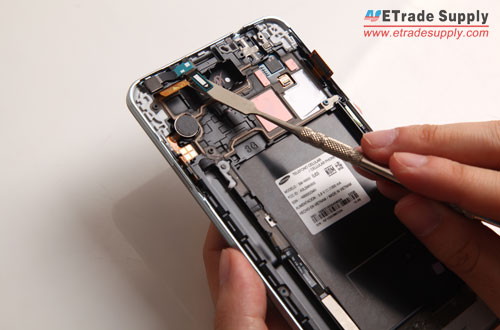
The Vibrating motor is glued on the front housing and connected with power button, so pry it out gently with the Phillips screwdriver.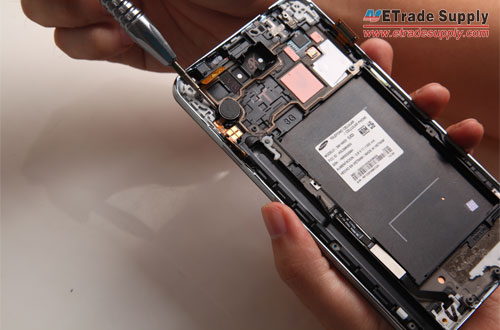
Step 14: Release the whole Galaxy Note 3 screen assembly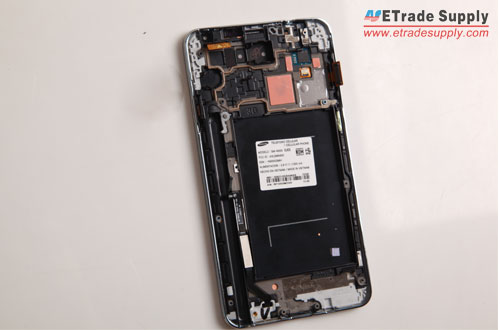
Note: If the Note III screens are smashed, the best way to repair the screen is to replace the LCD and touch screen digitizer assembly with front housing, for replacing only the Galaxy Note 3 glass screen or the LCD, touch screen needs professional tools and knowledge. You can go through the above-mentioned steps to this part and replace the entire display assembly.
The whole Samsung Galaxy Note III parts.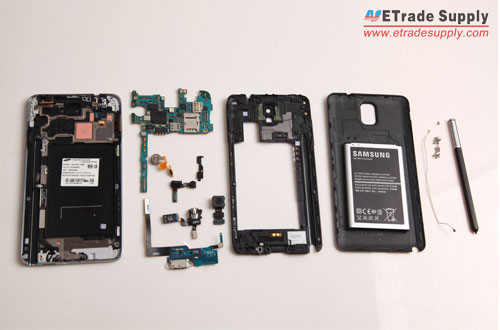
-
(4)3.2 StarsReviewed by W** He** G**Rating
Very good overall quality on build and colour reproduced.
[ ETS Answer ] Thanks for your kindly feedback.
We will speed the delivery and improve our service quality. To provide each customer better service, more professional training will be provided to our member.
Reviewed by Muham** Fa** KRatingVery good quality, super fast delivery to Malaysia. Also very good packaging.
Reviewed by Dav** Sor** s.**RatingVery good quality, perfect communication from seller. Thank you ETS
Reviewed by Hiday**RatingAfter assembling all back, I tested the all the sensors, IR blaster, TSP hovering, SPen hovering, red blue and green, black, and most importantly like most all note 3 problems, the multi touch. I could put 10 fingers and no glitching. which makes this product perfect. I recommend this to you all.

-
Customer also bought

 - Grade S+")
 GT-I9300/T999/I747/I535/L710/R530 Battery Replacement - With NFC Connector - Grade S+")

 GT-I9300 LCD Screen and Digitizer Assembly with Front Housing Replacement - Sapphire - Grade S+")

-
(Posted on 09/14/17)The item is exactly the same as the description, and beautifully packed for shipping.