

 Loading...
![]()


- Compatible With: XT1058, XT1060
-
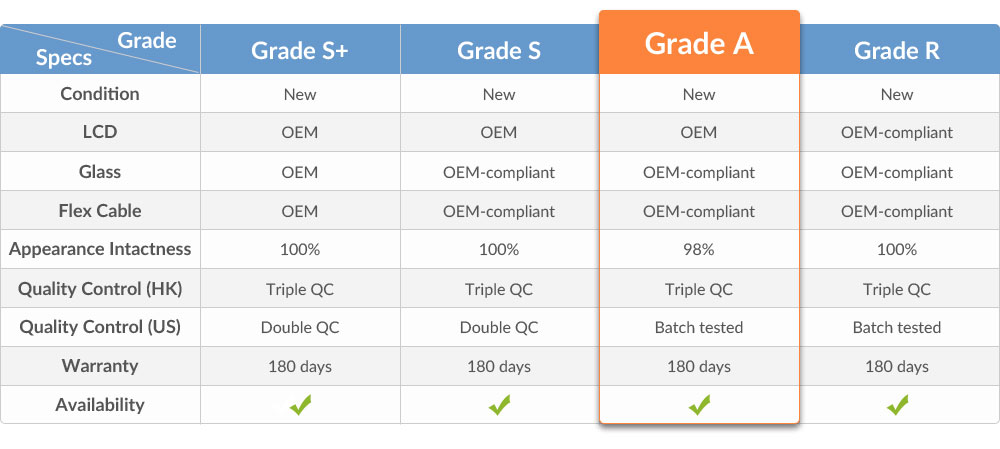
For Motorola Moto X XT1058 LCD Screen and Digitizer Assembly with Middle Frame Replacement - White - Without Any Logo - Grade A
This item includes the following components:
1. LCD Screen;
2. Digitizer Touch Screen;
3. Middle Frame;
4. Front Housing;
Notice: Please test the functionality of this item before installation.
Specifications:
Color: White
Version: AT&T
Screen Size: 4.7 inches
Resolution: 720 x 1280 pixels, 312 ppi pixel density
Display Type: AMOLED capacitive touchscreen, 16M colors
Protective Material: Corning Gorilla Glass
Features:
This Moto X LCD Assembly includes the LCD Screen, Digitizer Touch Panel, Front Housing and Middle Frame. It does NOT include any small parts.
This Moto X XT1058 LCD Screen and Digitizer Assembly is for AT&T Version. Please do not confuse it with the Moto X 1060 Verizon Version.
This is the Motorola Moto X LCD and Digitizer Assembly is brand new but not original replacement.
How to Install / Tips:
Please ensure to choose the right version and color before placing an order.
The Moto X LCD Screen and Digitizer are hermetically attached, special repairing tools are required for reassembly or disassembly.
Make sure to handle the repair or replacement work in a dry and dust free environment without direct sunlight.
The installation of any new part should be done by a qualified person. ETS is not responsible for any damage caused during installation.
Step 1. Power the Moto X off and use eject pin to take out the SIM card tray.

Step 2. Use the case opening tool to release clips holding the battery door in place, and then carefully open it since there is a flex cable connecting the battery door and motherboard, and adhesive on the battery door, which takes time to separate it. Then use case opening tool to disconnect the connector on the motherboard to remove the battery door.


Step 3. Use screwdriver to undo the 9 screws on the top and bottom of the motherboard.

Step 4. Remove the bottom cover on the motherboard.

Step 5. Remove the headphone jack with loud speaker on the top.

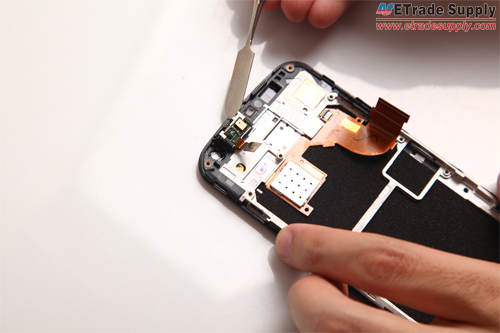
Step 6. Use Spudger to remove the side keys flex cable.

Step 7. Remove the front facing camera.

Step 8. Undo 2 screws to remove the metal shield used to fasten the motherboard.

Step 9. Disconnect 4 connectors and use Spudger to separate the battery with motherboard from the LCD assembly carefully since there is a connector to the LCD assembly. Then disconnect the connector.

Step 10. After the battery with motherboard is free, take out the rear facing camera on the motherboard.

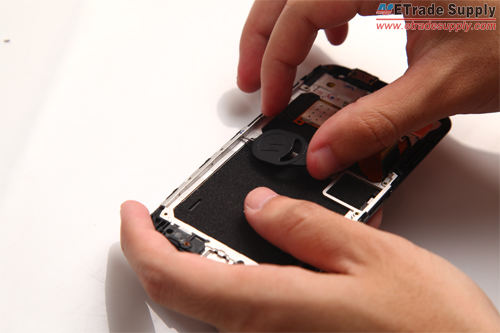
Step 11. Separate the battery and motherboard carefully since there is an adhesive in between.

Step 12. Remove the ear speaker on the top of the LCD assembly.
Step 13. Use eject pin to remove 7 pins holding the middle chassis in place.

Step 14. Once the 7 pins removed, use plastic case opening tool to release the middle chassis around the edge carefully. Then remove the chassis and the Moto X LCD assembly is free. (Please note that do not use metal opening tool or it will damage the LCD screen.)


Now the Moto X is completely disassembled.


-
Customer also bought


