


How to Repair a Cracked Screen on the Nexus 7 (2012 Edition)
BY yuki | July 26th, 2014 | 0 | 1
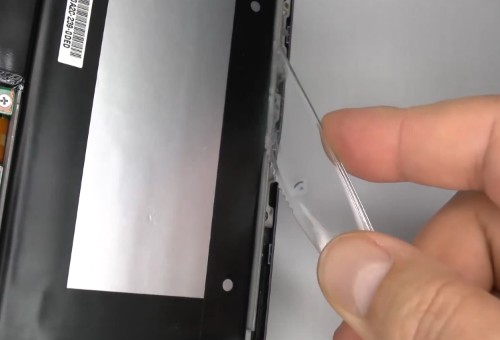
Cracked the screen on your Nexus 7 and don’t know what to do with it? Then this repair guide of repairing a cracked Nexus 7 screen could help you. Follow the steps blow and you’ll have a new screen on your Nexus 7. Tools: Small Phillips Screwdriver Plastic Pry Tool Case Opening Tool Replacement Part: Nexus 7 LCD Screen and Digitizer Assembly with Front Housing Or Nexus 7 LCD Screen and Digitizer Assembly Tweezers Step 1 Turn the Nexus 7 off and use case opening tool to separate the back cover from the front housing.  Step 2 Use tweezers to peel off two tapes securing the battery and use plastic pry tool to pry up the battery.
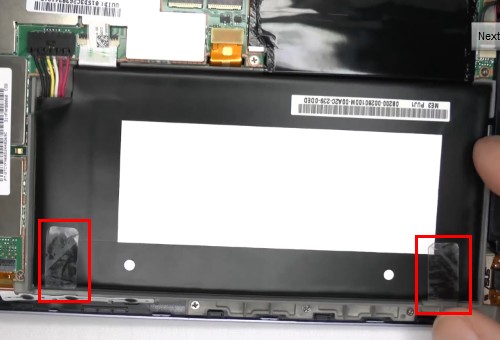
 Step 3 Unplug the battery connector to remove it.
 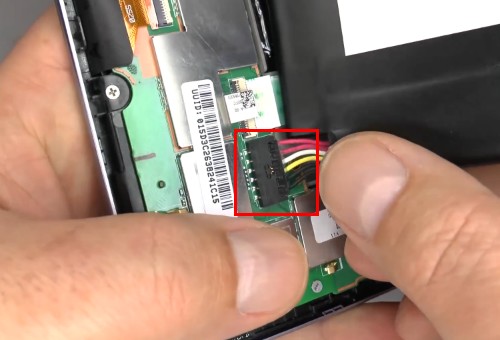 Step 4 Undo three screws to lift up the loud speaker module.
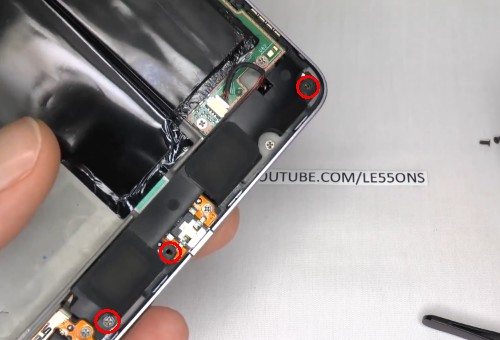
 Step 5 Unplug the loud speaker module connector to remove it.
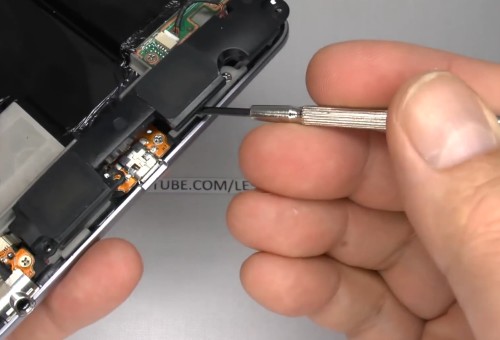
 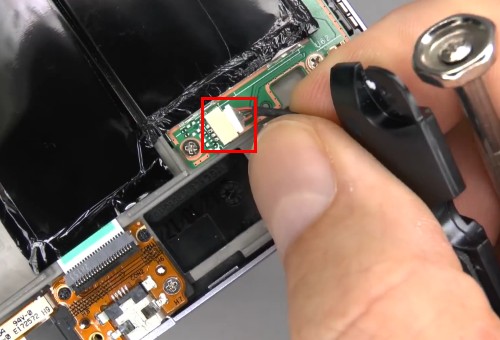 Step 6 Use small Phillips screwdriver to undo four screws securing the charging port flex cable.
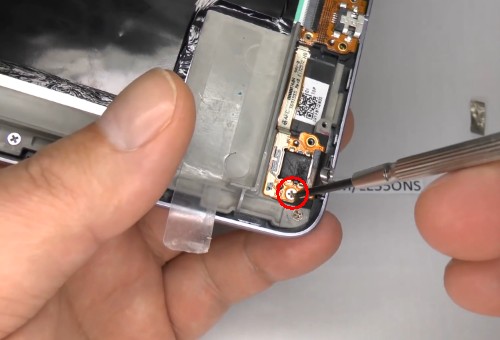
 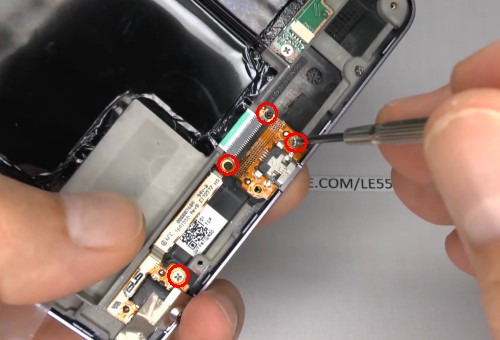 Step 7 Use tweezers to peel off the silver tape and undo one screw under there.
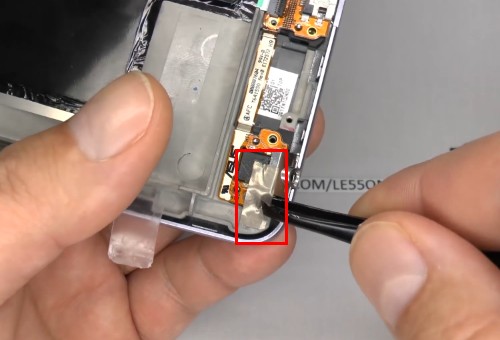
 Step 8 Lift up the connector bar to remove the charging port flex cable.
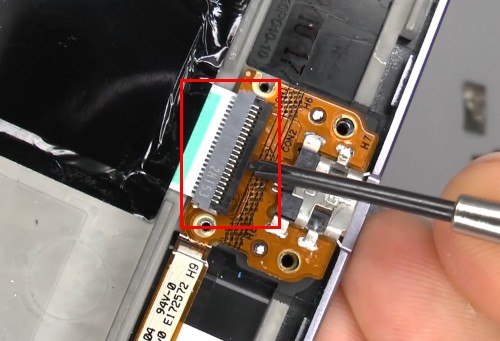
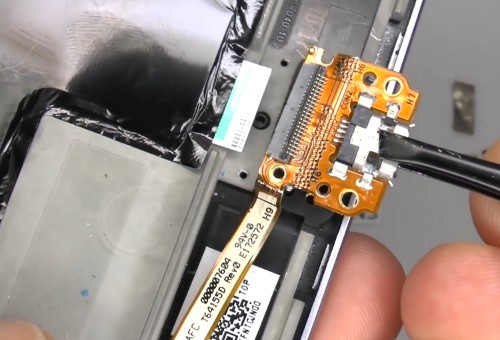 Step 9 Lift up the connector bar to remove the side keys’ flex cable.
 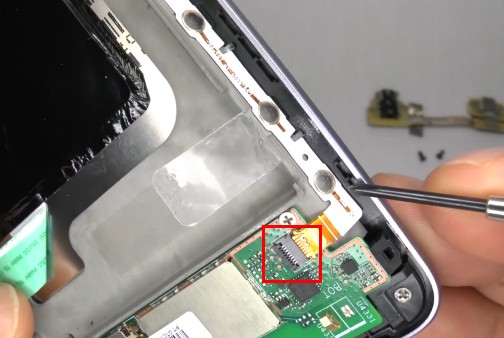 Step 10 Lift up the connector bar to disconnect the flex cable.
 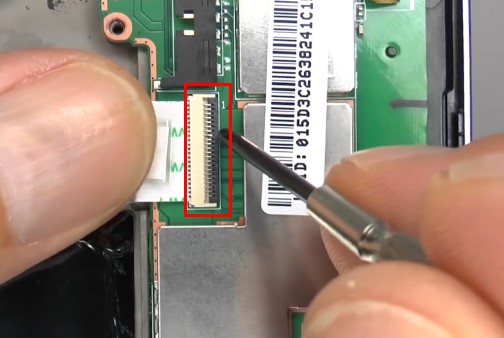 Step 11 Use heat gun to warm the heat sink foil.
 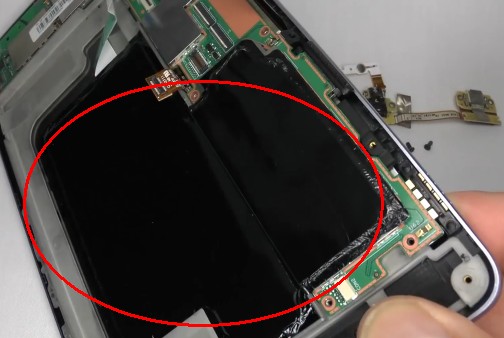 Step 12 Use tweezers to peel off the heat sink foil.
 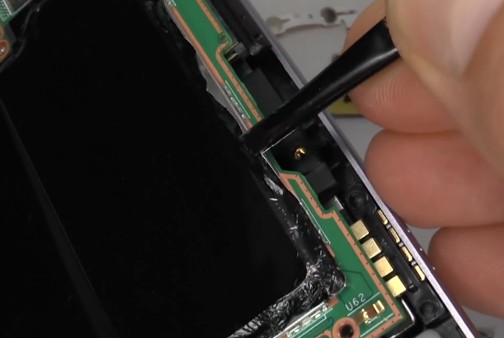 Step 13 Separate the heat sink foil from the flex cable until the heat sink foil is removed.
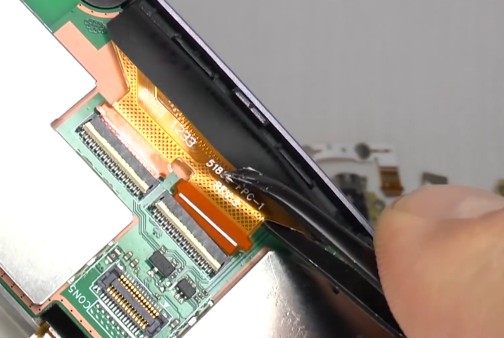
 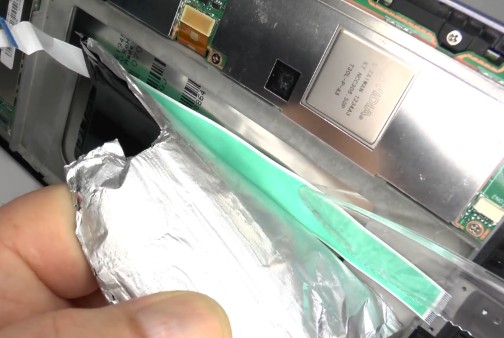 Step 14 Disconnect the flex cable with plastic pry tool.
 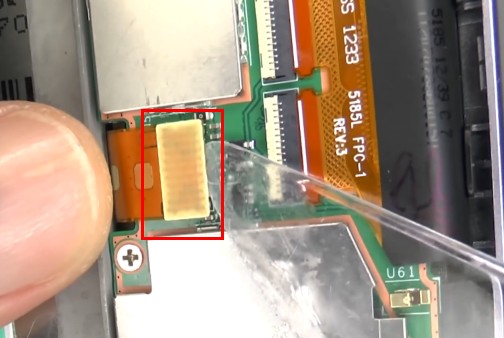 Step 15 Lift up the two connectors bars securing the flex cable in place and use tweezers to remove the flex cable.
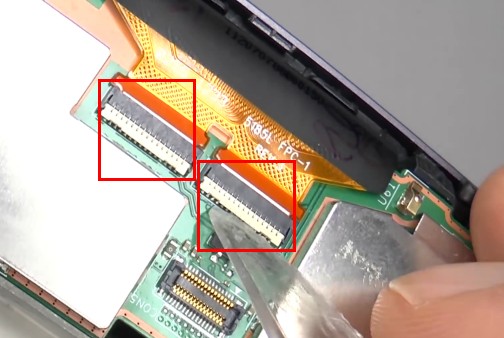
 Step 16 Remove the mainboard flex cable.
 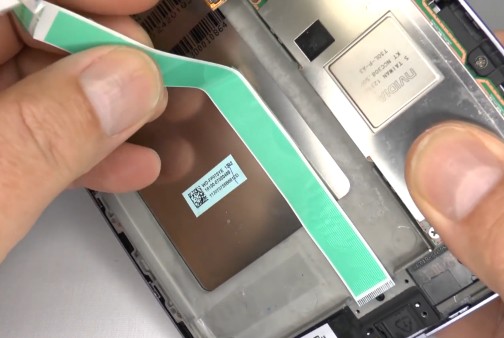 Step 17 Use tweezers to peel off the warranty label on the screw carefully.
 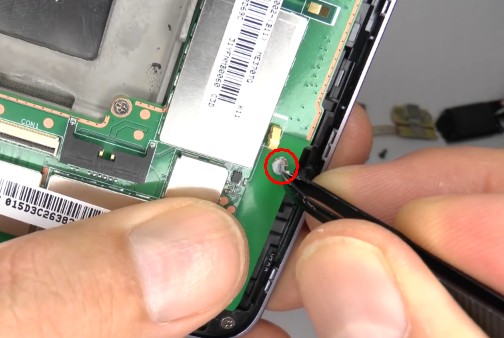 Step 18 Undo all the screws around the outside.
 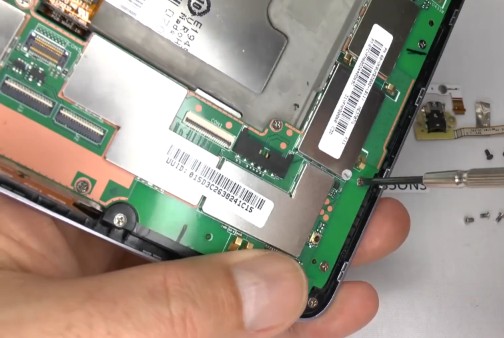 Step 19 Remove the mainboard away.
 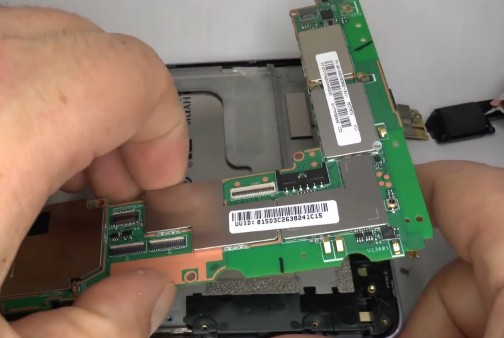 Step 20 Remove the metal frame.
 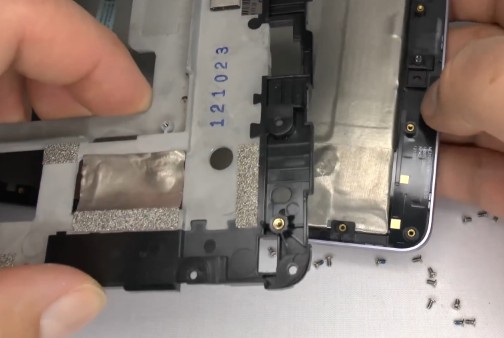 Step 21 Peel off the black tape and lift up the connector bar to remove the LCD flex cable. Now only the Nexus 7 screen assembly with frame is left. If the new screen replacement part you get comes with the frame, you can install the new screen and assemble the phone in reverse order above. But if the new screen doesn’t include the frame, you have to separate it from the broken screen as following steps.
 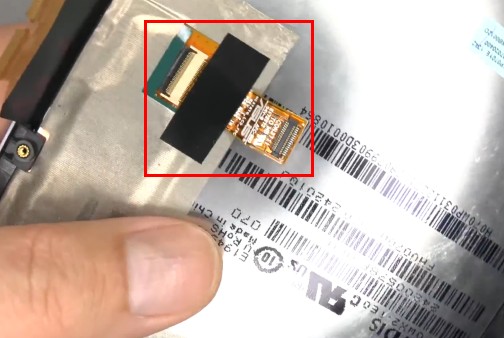 Step 22 Separate the frame from the screen by starting from the side carefully, because the frame is glued to the screen by double tape. Important note: it’s easy to separate the frame in the side part, but the top and bottom are glued tightly. It will be a little more difficult. If you want to avoid trouble, you’d better get a new screen with frame.
 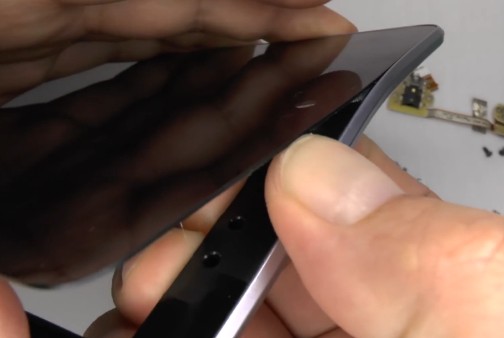 Step 23 Put the double tape back on the front frame in order to use it again. But if the double tape is useless after you peel it off, you have to get a new double tape.
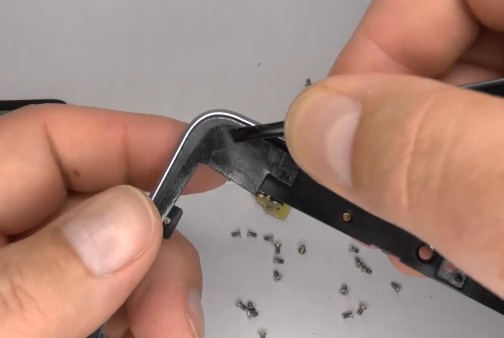
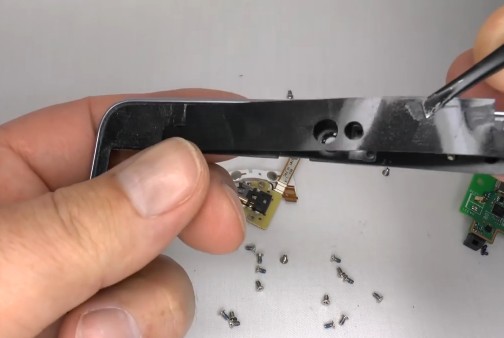 Step 24 Use tweezers to peel off the silver tape if the new replacement screen doesn't include it.
 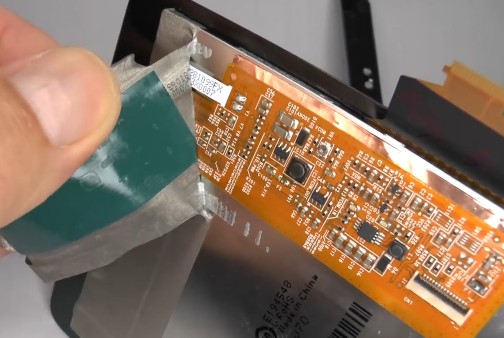 Step 25 If your new screen doesn’t come with the black foam pad, you have to transfer it to the new one.
 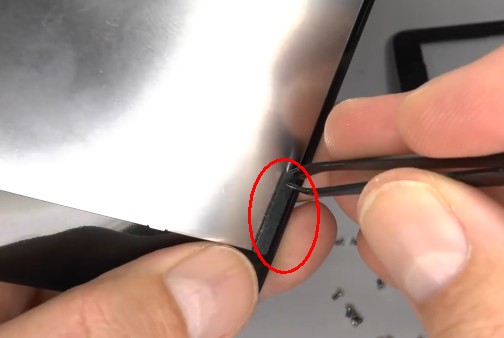 Now you can reinstall all the teardown parts to the new Nexus 7 replacement in reverse order above.


RECOMMENDED PARTS
-
 For Apple iPhone X OLED Screen and Digitizer Assembly with Frame Replacement - Black - Grade S+
-
 For Apple iPhone 8 Plus LCD Screen and Digitizer Assembly with Frame Replacement - Black - Grade S+
-
 For Apple iPhone 7 Plus LCD Screen and Digitizer Assembly with Frame Replacement - Black - Grade S+
-
 For Apple iPhone 6S Plus LCD Screen and Digitizer Assembly with Frame Replacement - Black - Grade S+
 IOS 17.4 official version pushed to block battery vulnerability
  Is the Chinese-made rear case for the iPhone 15 series going on the market?
  New products coming:USB to MFI Lightning Cable
  Big BUG of iPhone 15
  Successfully submitted!