


How to Replace the iPhone 5S Charging Port with Earphone Jack
BY alina | October 24th, 2013 | 0 | 2
If your iPhone 5S doesn’t charge anymore but the charger is fine, then the culprit may be the charging port. Besides, if your iPhone 5S is charging too long time and overheating, the charging port could be damaged. Under such circumstances, you have to replace the broken charging port with a new one. Follow our iPhone 5S charging port with earphone jack replacement tutorial to fix the one on your handset.

Tools and replacement part needed to repair the iPhone 5S charging port with earphone jack:
Case Opening Tool
Metal Spudger Tool
Pentalobe screwdriver
Small Philips screwdriver
New iPhone 5S Charging Port with Earphone Jack
Step 1
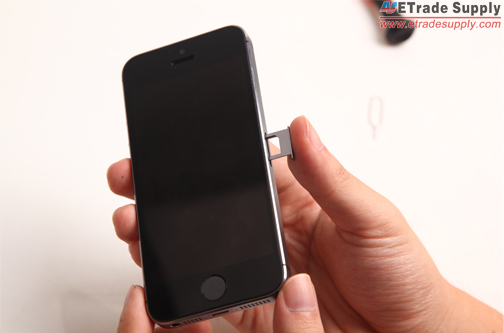
Power the iPhone 5S off and use eject pin to take out the SIM card tray.

Step 2
Use Pentalobe screwdriver to undo 2 screws at the bottom of the phone.
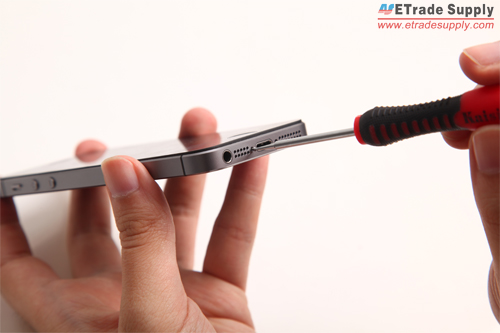
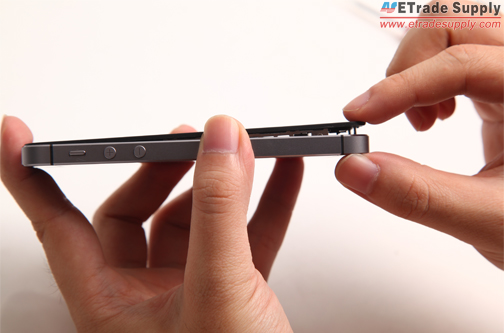
Step 3
Use spudger tool to carefully pry up the LCD assembly and wedge the opening tool case between the LCD assembly and rear housing to make it easy to release all the clips around the assembly.


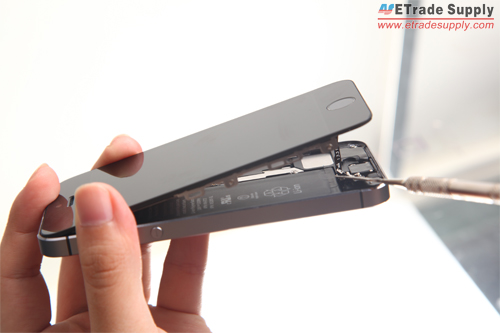
Step 4
Gently open up the screen assembly to avoid damage the Touch ID flex cable. Lift up the retaining bracket holding the Fingerprint sensor cable in place and disconnect the cable.
Step 5
Undo 2 screws to remove the metal shield and disconnect the charging port flex cable connector and antenna connector.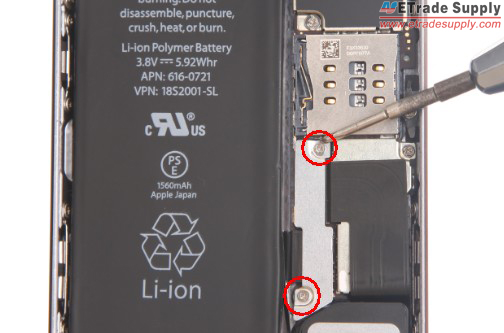

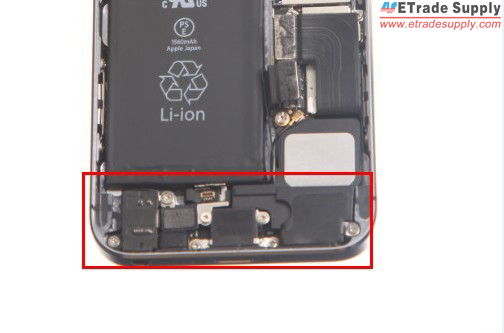
Step 6
Release 7 screws to remove the loud speaker. Then use spudger to remove the broken charging port with headphone jack.

Step 7
Assemble the new iPhone 5S charging port with headphone jack on the rear housing. Then put the loud speaker back and fasten them with 7 screws.

Step 8
Buckle the antenna connector and the charging port cable connector, and cover it with metal shield and use 2 screws to fasten it.

Step 9
Assemble the retaining bracket to hold the Touch ID cable in place.

Step 10
Press down the LCD assembly carefully and make sure all the clips are in place.
Step 11
Fasten the LCD display assembly and rear housing with 2 screws.

Step 12
Put the SIM card tray back and power the iPhone 5S on to make sure it works normally.
If you have to repair other parts on your iPhone 5S, you can watch our videos of iPhone 5S disassembly and iPhone 5S assembly. ETrade Supply is always your best choice to get the iPhone 5S replacement parts


RECOMMENDED PARTS
-
 For Apple iPhone X OLED Screen and Digitizer Assembly with Frame Replacement - Black - Grade S+
-
 For Apple iPhone 8 Plus LCD Screen and Digitizer Assembly with Frame Replacement - Black - Grade S+
-
 For Apple iPhone 7 Plus LCD Screen and Digitizer Assembly with Frame Replacement - Black - Grade S+
-
 For Apple iPhone 6S Plus LCD Screen and Digitizer Assembly with Frame Replacement - Black - Grade S+
 IOS 17.4 official version pushed to block battery vulnerability
  Is the Chinese-made rear case for the iPhone 15 series going on the market?
  New products coming:USB to MFI Lightning Cable
  Big BUG of iPhone 15
  Successfully submitted!