How to Assemble Small Parts on iPhone 6 LCD Screen Assembly
BY Davi | June 25th, 2015 | 0 | 0
We recently posted an article showing you how to install all the smaller parts on the iPhone 5 LCD screen assembly, which takes a lot of time for repair shop owners. Now we want to show you how to install all the smaller parts to the iPhone 6 LCD screen assembly, hope it helps you out.
We do recommend a qualified person do the job since it is easy to damage the parts during installation. If you are DIY enthusiasts and confident, follow our steps to complete below. We also have a video tutorial at the bottom of the blog for your reference.
Tools Needed:
- Tweezers
- PH00 Philips Screwdriver
Small parts list:
-
Apple iPhone 6 LCD Screen and Digitizer Assembly with Frame - Black - A Grade
- Apple iPhone 6 LCD Back Plate - A Grade
- Apple iPhone 6 LCD Back Plate Heatsink Shield - A Grade
- Apple iPhone 6 Home Button Rubber Gasket - A Grade
- Apple iPhone 6 Front Facing Camera Bezel - A Grade
- Apple iPhone 6 Sensor Retaining Bracket - A Grade
- Apple iPhone 6 Ear Speaker - A Grade
- Apple iPhone 6 LCD Screen Foam - A Grade
- Apple iPhone 6 LCD Screen and Digitizer Assembly Anti-Static Sticker (QR Code Sticker) - A Grade
- Apple iPhone 6 LCD Screen and Digitizer Assembly with Frame - Black - A Grade
- Apple iPhone 6 Home Button Extension Flex Cable Ribbon - A Grade
- Apple iPhone 6 Home Button Assembly with Flex Cable Ribbon - Gold - A Grade
- Apple iPhone 6 Sensor Flex Cable Ribbon - A Grade
- Apple iPhone 6 Home Button Mounting Bracket - A Grade
- Apple iPhone 6 Screw Set (59 pcs/set) - Silver - A Grade
- Apple iPhone 6 Ear Speaker Retaining Bracket - A Grade
Steps:
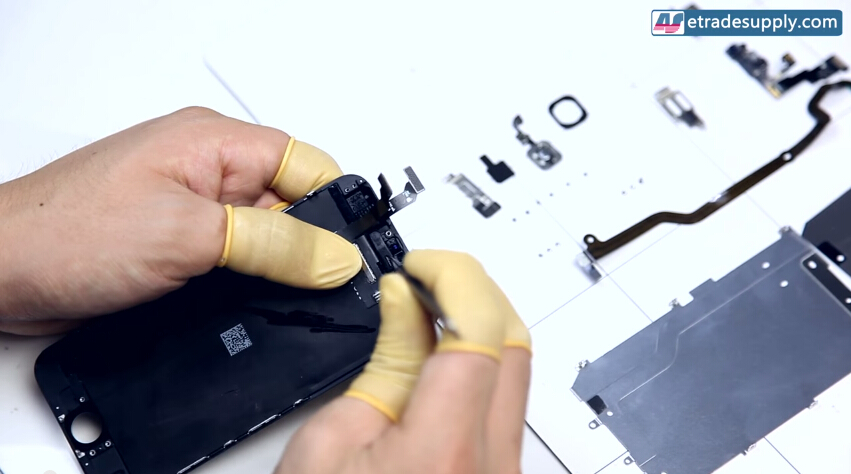
1. Put the rubber ear speaker gasket into the slot. Be sure to dip it in a little adhesive before setting it in place.
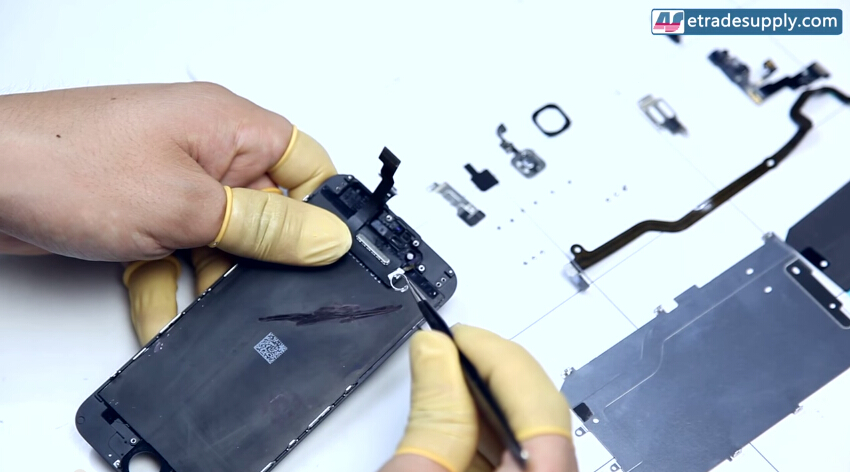
2. Put the front facing camera's retaining bracket into the slot, same like the rubber gasket before dip the bracket into some adhesive before installing it. Pay attention to how you set the part. You want to be sure you get it centered otherwise you may block the camera.
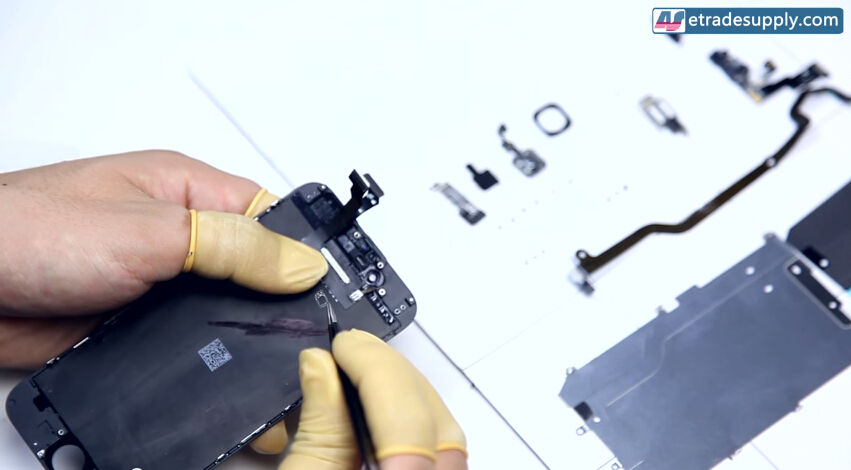
3. Lay the Proximity Sensor's retaining bracket into the slot. Make sure to line it up carefully before like with the camera bracket.
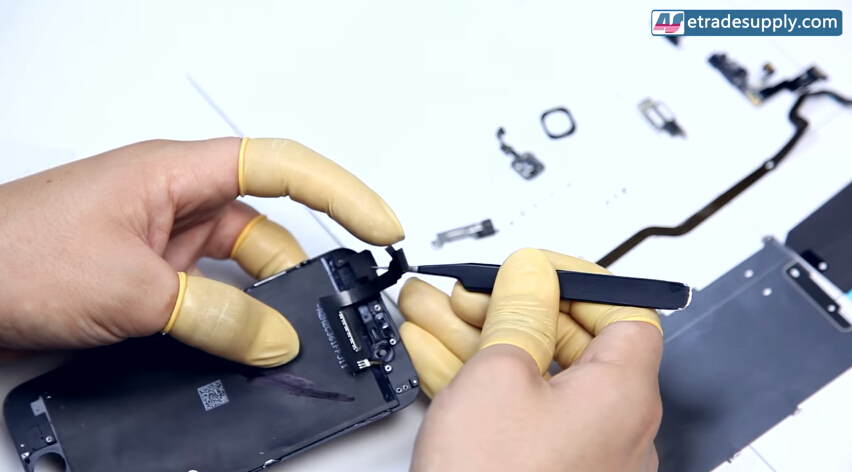
4. Apply the anti-static sticker on the left and corner of the back of the screen, covering the QR code.
5. Place the home button's flex extension cable on the metal back plate, while making sure all the holes line up.
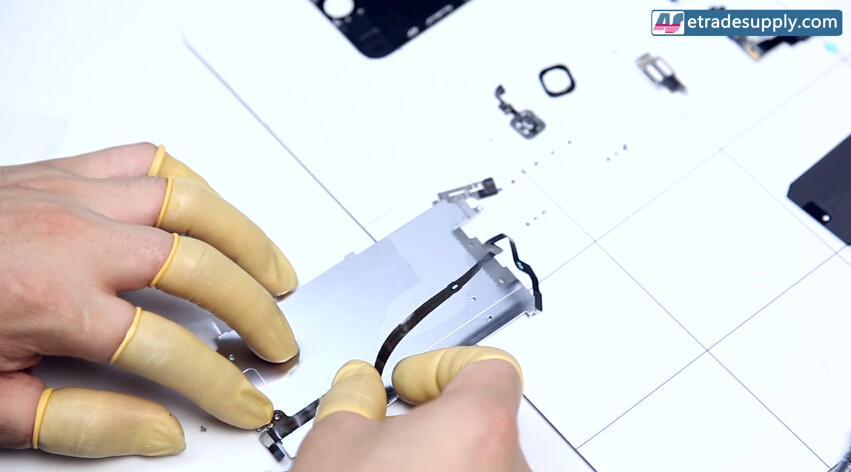
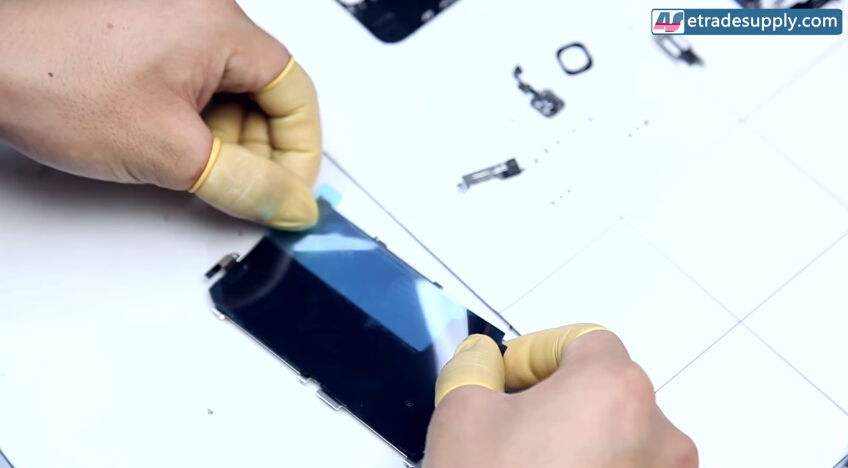
6. Pull off the adhesive covers and line it up, also take care of the holes both on the heat shield and back plate when applying the heat shield. Make sure the flex ribbon, heat shield and metal backplate are perfectly fit.
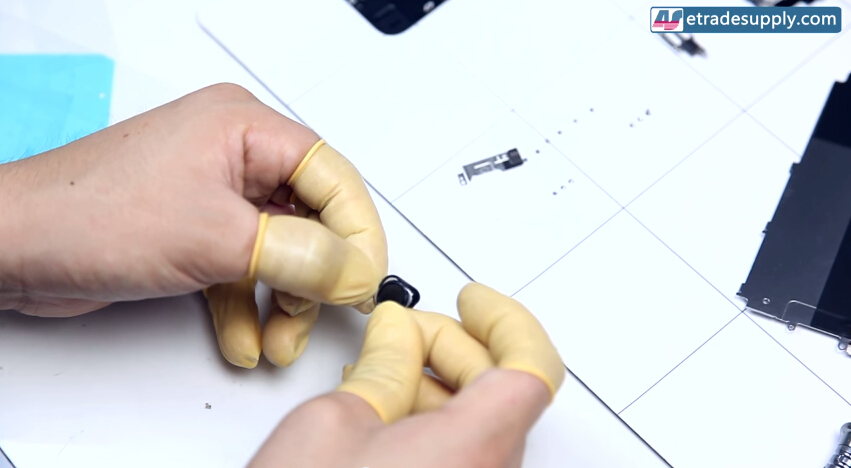
7. Attach the rubber cover to the back of the button. Make sure the flex goes through the rubber cover then just line it up and squish them together.
8. Lay the metal back plate on the back of the LCD screen. (Notice: the top and the bottom of the metal plate are different, and to avoid damaging the IC during the installation, you’d better insert the back plate after pulling aside the flex cable at the top of the LCD screen assembly.)
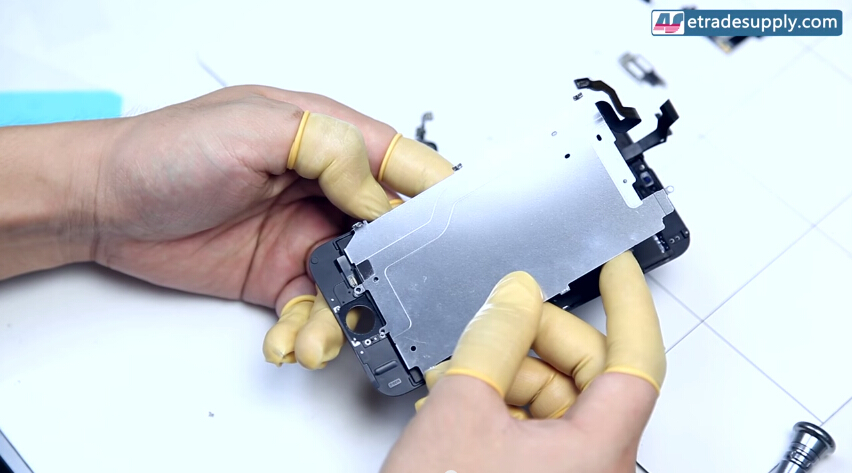
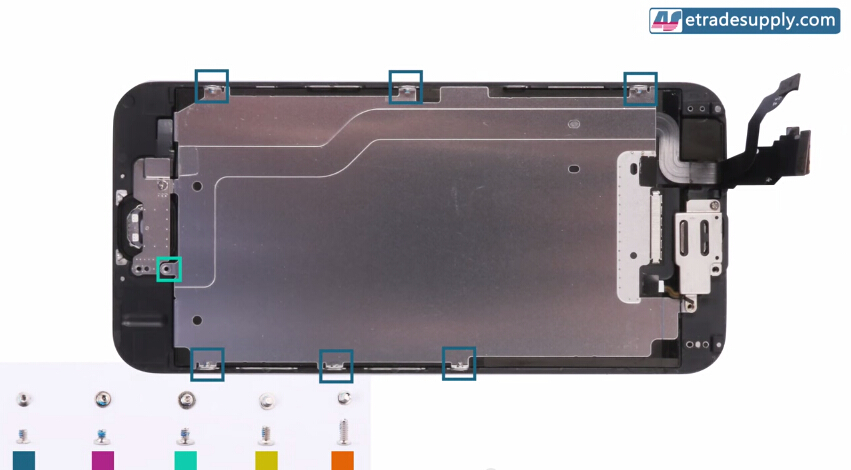
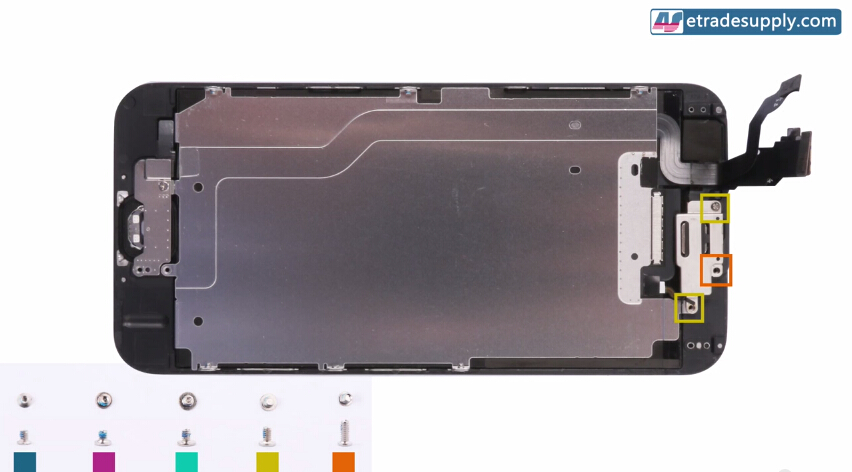
9. Fasten the 7 screws in the metal back plate. There are 5 different screws so pay close attention to the picture below.
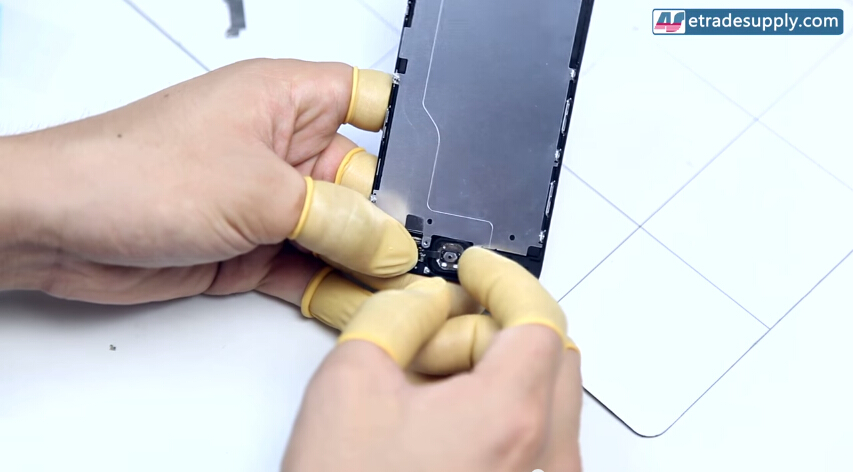
10. Put the home button assembly into the slot and connect the home button flex cable to the home button extension flex cable.
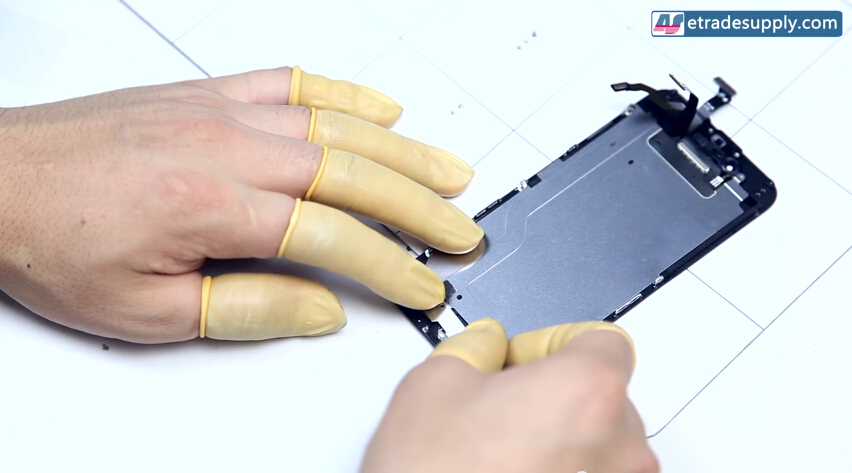
11. Lay the metal mounting bracket on the home button.
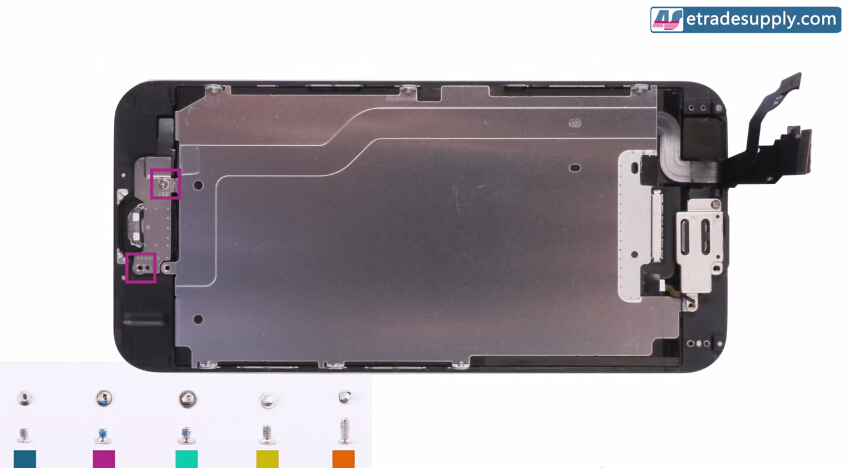
12. Fasten the 2 screws in the mounting bracket. You can try the home button to feel whether it is installed right or not. (Make sure to choose the right screws as we have displayed in the picture below.)
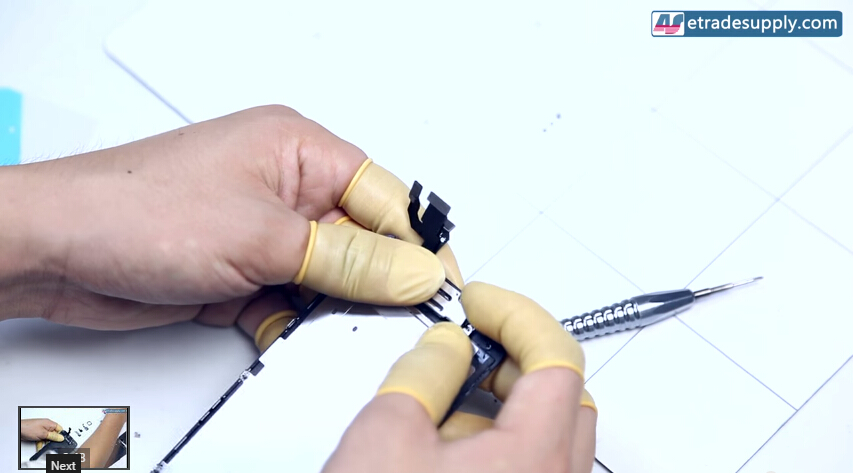
13. Put the front-facing camera flex cable with sensor assembly into the slot. (Notice: You have to fold 2 small cable ribbons on the assembly to make sure they can be inserted to the slot and fit perfectly.)
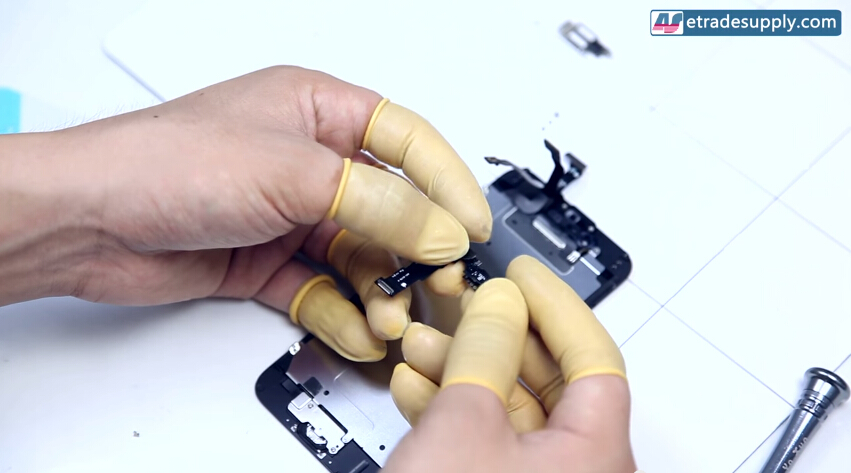
To install the flex cable, you should insert the microphone into its slot first.
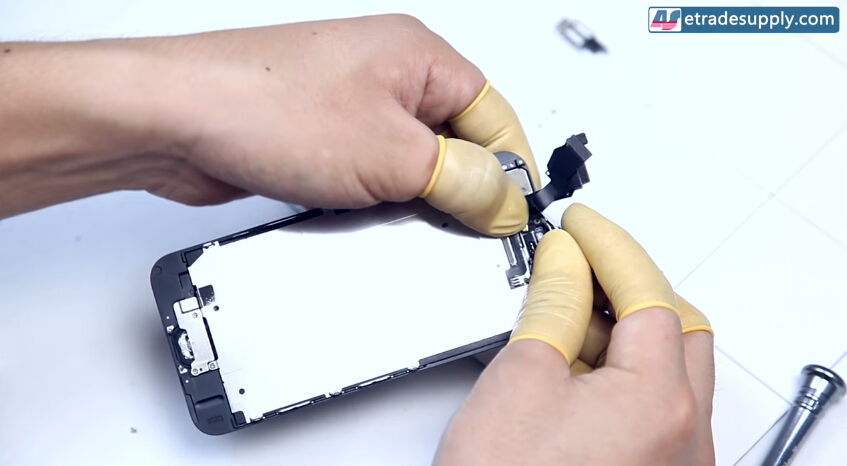
Then, you should put the sensor flex in the right place.
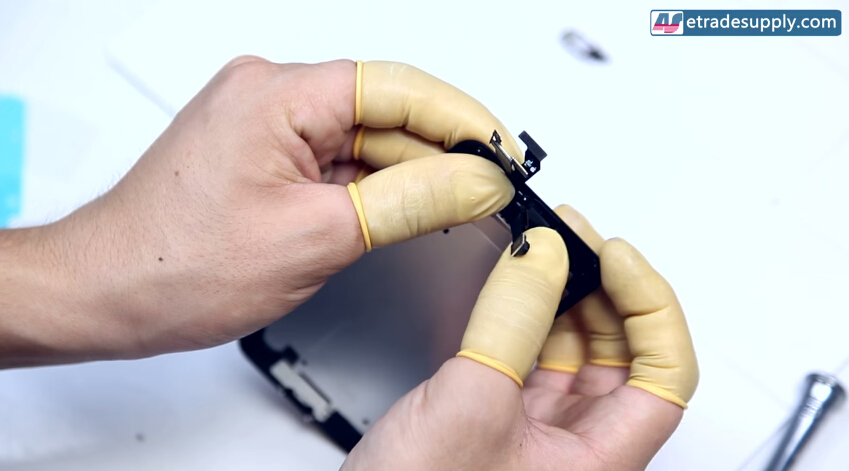
14. Once the front-facing camera flex cable with sensor assembly has been inserted into the slot, you need to put the ear speaker in the assembly. Make sure the 4 contacts are connected to the ear speaker and it is flush against the mesh cover.
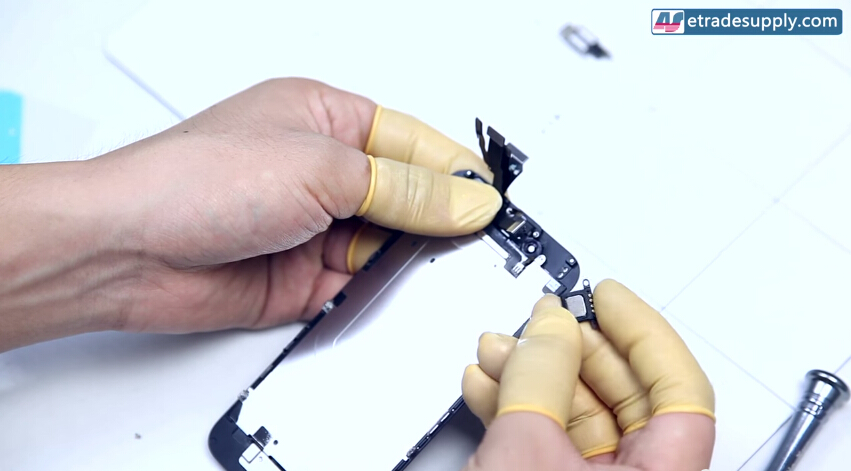
15. Put the ear speaker retaining bracket on the flex cable, then you should fasten 3 screws in the different slots. (Notice: Refer to the picture below.)
Questions, feel free to contact us directly or comment below. You can also send us an email at service@etradesupply.com, and we'll reply ASAP.
|
|

|

|

|

|

|
|---|
RECOMMENDED PARTS
-
 For Apple iPhone 6/iPhone 6 Plus Home Button Assembly with Flex Cable Ribbon Replacement - Gold - Grade S+
-
 For Apple iPhone 6 LCD Screen and Digitizer Assembly with Frame and Small Parts Replacement (without Home Button) - Black - Grade S+
-
 For Apple iPhone X OLED Screen and Digitizer Assembly with Frame Replacement - Black - Grade S+
-
 For Apple iPhone 8 Plus LCD Screen and Digitizer Assembly with Frame Replacement - Black - Grade S+


 IOS 17.4 official version pushed to block battery vulnerability
  Is the Chinese-made rear case for the iPhone 15 series going on the market?
  New products coming:USB to MFI Lightning Cable
  Big BUG of iPhone 15
  Successfully submitted!